Table of Contents
Video Tutorial
Introduction
Autodesk Maya is a powerful 3D modeling and animation software widely used in the entertainment industry. However, it is also a valuable tool for architectural visualization. One of the challenges in creating realistic architectural models is adding top windows. In this article, we will explore how to use cylinders to create top windows in Autodesk Maya 2019.
The article will begin with an overview of Autodesk Maya 2019 and its basic concepts for adding top windows. It will then delve into the process of preparing the Maya workspace and creating cylinders in Maya. The article will also cover modifying cylinders for top windows, integrating cylinders into the scene, and texturing and lighting the scene. Finally, the article will provide a review of Autodesk Maya’s tools for adding windows and offer some final thoughts on using Maya for architectural visualization.
Key Takeaways
- Autodesk Maya 2019 is a powerful tool for architectural visualization.
- Cylinders can be used to create top windows in Maya.
- By following the steps outlined in this article, users can create realistic architectural models with top windows in Autodesk Maya 2019.
Overview of Autodesk Maya 2019
Autodesk Maya 2019 is a powerful 3D modeling and animation software that is widely used in the film, television, and video game industries. It offers a wide range of tools and features that allow users to create stunning visuals and realistic animations.
One of the key features of Maya 2019 is its ability to add top windows using cylinders. This feature allows users to easily create complex shapes and structures with just a few clicks. The software also offers a variety of other modeling tools, including polygon modeling, NURBS, and subdivision surfaces.
In addition to its modeling capabilities, Maya 2019 also includes a wide range of animation tools. The software offers a powerful animation timeline that allows users to create complex animations with ease. It also includes tools for rigging, skinning, and motion graphics.
Maya 2019 also offers a variety of rendering options, including the Arnold renderer, which is widely used in the film and television industries. The software also includes a new Render Setup system, which allows users to easily manage and organize their rendering settings.
Overall, Autodesk Maya 2019 is a powerful and versatile 3D modeling and animation software that offers a wide range of tools and features. Whether you’re a professional animator or just starting out, Maya 2019 is a great choice for creating stunning visuals and realistic animations.
Basic Concepts for Adding Top Windows
When it comes to adding top windows to a 3D model in Autodesk Maya 2019, there are a few basic concepts that users should keep in mind. These concepts will help ensure that the final product looks polished and professional.
First and foremost, it’s important to consider the size and shape of the window. This will depend on the overall design of the building or structure being modeled. It’s important to take into account factors such as the height and width of the building, as well as the desired level of natural light and ventilation.
Another key consideration is the placement of the window. Where on the building should it be located? Should it be centered or off-center? Should it be placed at a certain height or angle? These are all important questions to consider when adding top windows to a model.
Once the size and placement of the window have been determined, it’s time to think about the materials and textures that will be used. Will the window be made of glass, metal, or some other material? What color and texture should it have? These are all important considerations that will help bring the window to life and make it look realistic.
Overall, adding top windows to a 3D model in Autodesk Maya 2019 requires careful attention to detail and a solid understanding of basic design principles. By keeping these concepts in mind, users can create top windows that are both functional and aesthetically pleasing.
Preparing the Maya Workspace
Setting Up the Project
Before starting to work on a new project, it is important to set up the project in Maya. This involves creating a new project directory, specifying the location of the project files, and setting up the project preferences. By setting up the project, all the files related to the project will be organized in a single location, making it easier to manage and share the project with others.
Navigating the Interface
Maya’s interface can be intimidating for new users, but it is designed to be intuitive and easy to navigate. The main interface is divided into several panels, each with its own set of tools and options. The viewport is where the 3D models are displayed, while the attribute editor and channel box are used to modify the properties of the selected objects. The outliner displays a hierarchical view of the scene, and the script editor is used to write and execute scripts.
Customizing the Layout
Maya’s interface is highly customizable, allowing users to create their own layouts and workflows. The interface can be rearranged and resized, and new panels can be added or removed as needed. Users can also create custom hotkeys and marking menus to speed up their workflow. Maya also supports multiple monitors, allowing users to spread out their workspace across multiple screens.
In conclusion, preparing the Maya workspace is an essential step before starting any project. By setting up the project, navigating the interface, and customizing the layout, users can work more efficiently and effectively in Maya.
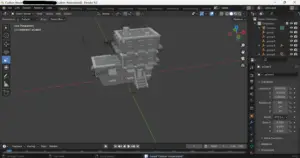
Creating Cylinders in Maya
Cylinders are a fundamental primitive shape in Autodesk Maya, and they can be used for a wide range of purposes, including creating top windows for buildings. In this section, we will discuss how to create cylinders in Maya and how to position them for creating top windows.
Choosing the Right Cylinder Parameters
When creating a cylinder in Maya, it is essential to choose the right parameters to ensure that it matches the intended design and purpose. The parameters that can be adjusted include the radius, height, subdivisions axis, and subdivisions height.
The radius determines the size of the cylinder’s base, while the height determines its overall height. The subdivisions axis and height determine the number of faces on the cylinder’s surface, with higher subdivisions resulting in smoother surfaces.
Positioning Cylinders for Windows
Once the cylinders have been created, they need to be positioned correctly to create top windows. This involves selecting the cylinder, moving it to the desired location, and rotating it to the correct orientation.
It is essential to position the cylinders accurately to ensure that they align with the building’s walls and roof. This can be achieved by using Maya’s snap tools, which enable the cylinders to snap to specific points on the building’s geometry.
In conclusion, creating cylinders in Maya is a straightforward process that can be used to create top windows for buildings. By choosing the right parameters and positioning the cylinders accurately, users can create realistic and visually appealing top windows that enhance the building’s overall design.
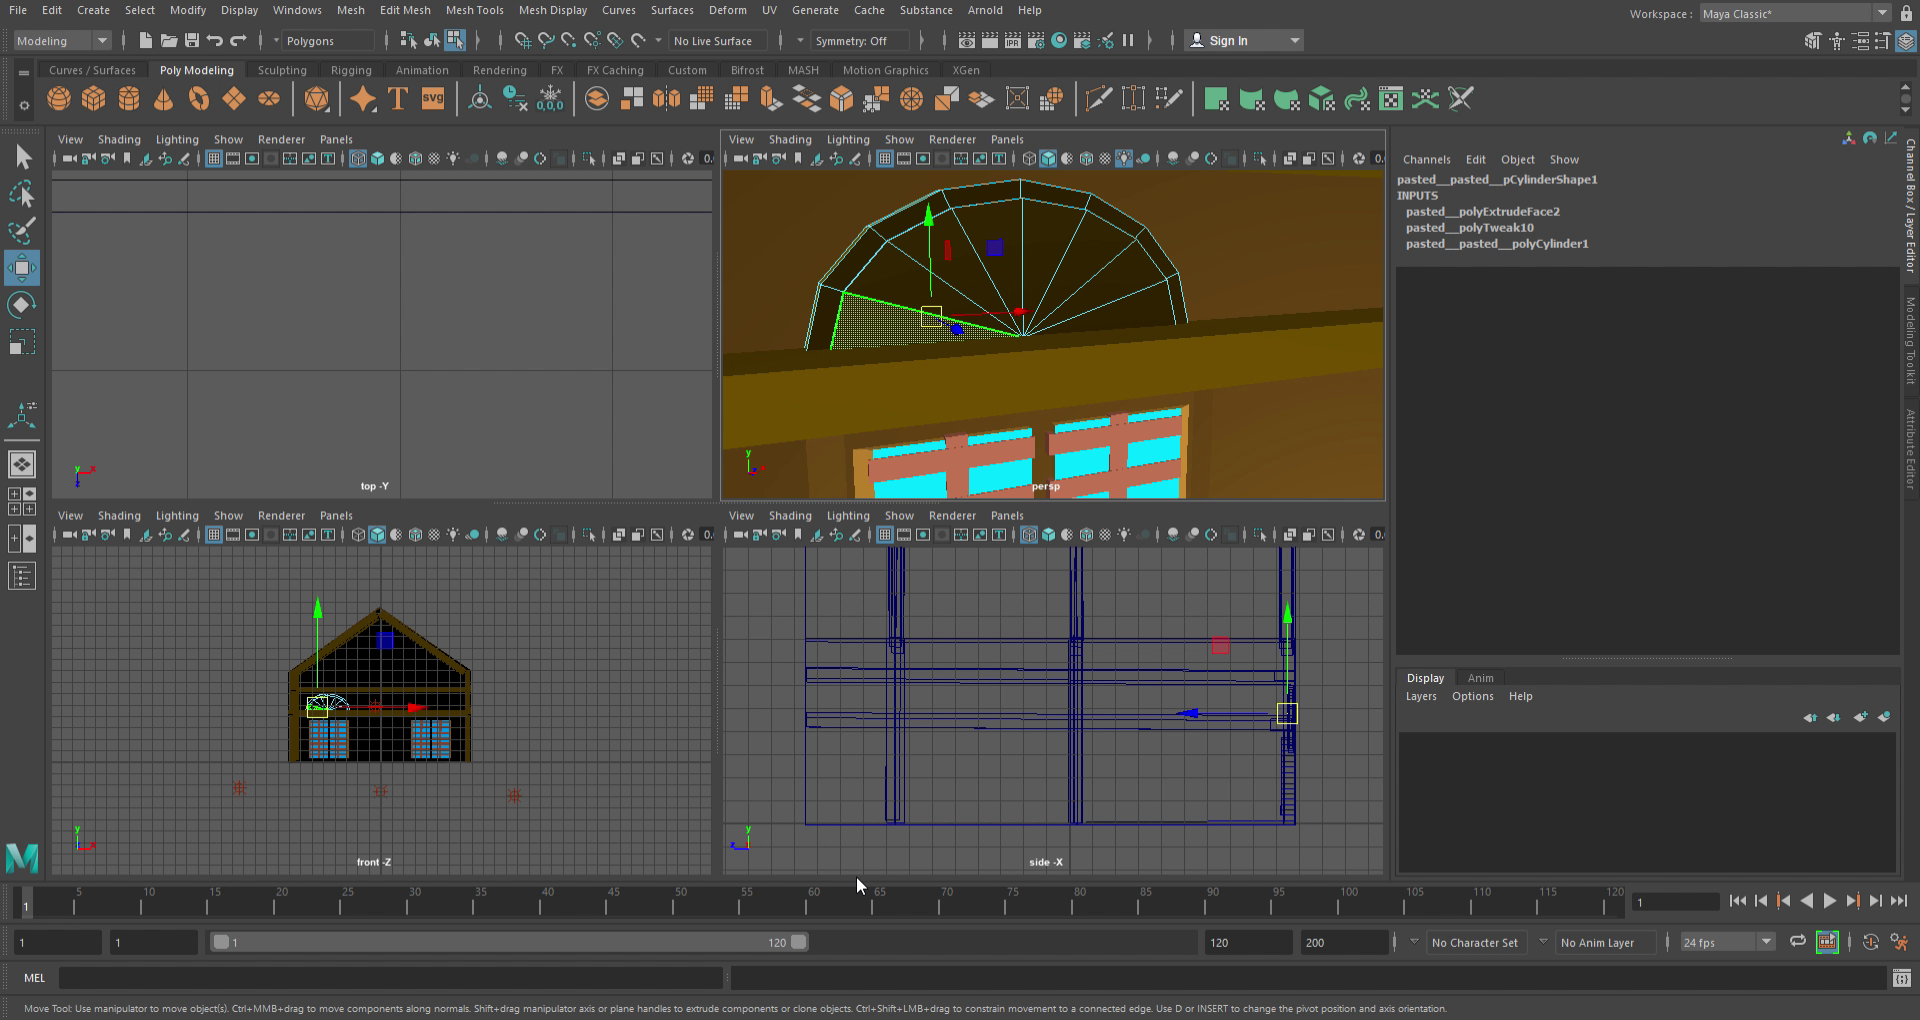
Modifying Cylinders for Top Windows
When it comes to adding top windows using cylinders in Autodesk Maya 2019, modifying the cylinders to fit the specific needs of the project is an important step. This section will cover the two main aspects of modifying cylinders for top windows: adjusting cylinder dimensions and fine-tuning the shape.
Adjusting Cylinder Dimensions
The first step in modifying cylinders for top windows is adjusting the cylinder dimensions. This can be done by selecting the cylinder and using the scale tool to adjust the height, radius, and subdivisions of the cylinder. It is important to ensure that the dimensions of the cylinder match the dimensions of the window frame to ensure a proper fit.
Another way to adjust the dimensions of the cylinder is by using the attribute editor. This allows for more precise adjustments to be made, such as adjusting the height and radius separately. The attribute editor can also be used to adjust the number of subdivisions in the cylinder, which can affect the smoothness of the final shape.
Fine-Tuning the Shape
Once the dimensions of the cylinder have been adjusted, the next step is to fine-tune the shape. This can be done by selecting the cylinder and using the sculpting tools in Maya to adjust the shape of the cylinder to match the desired shape of the window. The sculpting tools allow for precise adjustments to be made to the shape, such as smoothing out rough edges or adding curves to the cylinder.
Another way to fine-tune the shape of the cylinder is by using the deformers in Maya. Deformers allow for more complex adjustments to be made to the shape of the cylinder, such as adding a bulge or twist to the shape. Deformers can be applied to the cylinder by selecting the cylinder and then selecting the desired deformer from the deform menu.
In conclusion, modifying cylinders for top windows in Autodesk Maya 2019 is an important step in creating a realistic and accurate model. By adjusting the dimensions and fine-tuning the shape of the cylinder, the final result will match the desired look and feel of the project.
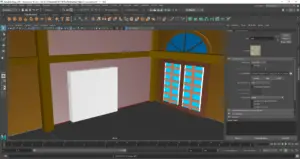
Integrating Cylinders into the Scene
When working with Autodesk Maya 2019, adding top windows using cylinders can be a great way to enhance the realism of a scene. However, integrating these cylinders into the scene can be a bit tricky. This section will cover two methods for integrating cylinders into a scene: snapping to surfaces and merging with existing geometry.
Snapping to Surfaces
One way to integrate cylinders into a scene is by snapping them to surfaces. This is particularly useful when adding windows to a building. To snap a cylinder to a surface, follow these steps:
- Create a cylinder and position it where you want it in the scene.
- Select the cylinder and go to the Move tool.
- Hold down the “v” key and click on the surface you want to snap the cylinder to.
- The cylinder will now snap to the surface. You can adjust its position as needed.
Snapping to surfaces is a quick and easy way to integrate cylinders into a scene. However, it may not always be the best method, particularly if you need more control over the placement of the cylinder.
Merging with Existing Geometry
Another way to integrate cylinders into a scene is by merging them with existing geometry. This method is particularly useful when adding details to a larger object, such as a vehicle or a piece of machinery. To merge a cylinder with existing geometry, follow these steps:
- Create a cylinder and position it where you want it in the scene.
- Select the cylinder and go to the Mesh menu.
- Choose “Boolean” and then “Union”.
- Click on the object you want to merge the cylinder with.
- The cylinder will now be merged with the object.
Merging with existing geometry gives you more control over the placement of the cylinder, but it can be more time-consuming than snapping to surfaces.
Overall, integrating cylinders into a scene in Autodesk Maya 2019 can be a bit challenging, but with these methods, you can add top windows and other details with ease.
Overall Conclusion
In conclusion, utilizing cylinders in Autodesk Maya 2019 is an essential and effective technique for 3D modeling and animation. The versatility of cylinders allows for the creation of a wide range of objects, from basic geometric shapes to intricate mechanical parts and organic forms. By leveraging the various manipulation tools and modifiers available in Maya, such as extrusion, beveling, and smoothing, artists can easily craft complex and detailed designs with cylinders as the foundational building blocks.
Furthermore, the ability to seamlessly integrate cylinders into larger compositions and scenes makes them a valuable asset for achieving visual coherence and balance in 3D projects. Overall, the efficient and flexible nature of using cylinders in Autodesk Maya 2019 empowers artists to bring their creative visions to life with precision and impact.
In addition, the use of cylinders in Autodesk Maya 2019 offers practical benefits in terms of workflow efficiency and resource optimization. The inherently modular and parametric nature of cylinders enables artists to rapidly prototype and iterate on designs, thereby streamlining the development process. Furthermore, the ability to easily adjust the dimensions, proportions, and orientation of cylinders allows for quick experimentation and exploration of different design possibilities.
This agility not only enhances productivity but also facilitates a more dynamic and adaptive approach to 3D modeling and animation. Moreover, the lightweight geometry of cylinders minimizes computational overhead, contributing to smoother viewport performance and faster rendering times. As a result, integrating cylinders into the workflow in Autodesk Maya 2019 not only enhances the creative potential but also improves the overall efficiency and effectiveness of the production pipeline.
If you are into more projects such as Maya 3D that we made for the blog, then I suggest you check out our main blog categories and some extra stories on our blog.
Check out Maya today and special thanks to AngeloJacksonED for supplying the video.