Table of Contents
Video Tutorial
Why Consider Adding Wall Objects in a 3D House?
Maya is a powerful 3D modeling and animation software that allows users to create stunning visuals for a variety of applications. One of the key features of Maya is its ability to create and manipulate wall objects in 3D space. Whether you are designing a building, creating a game environment, or making a movie set, knowing how to add wall objects in Maya is an essential skill.
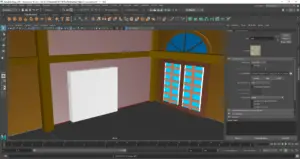
To begin adding wall objects in Maya, users must first create a basic floor plan. This can be done using Maya’s polygonal modeling tools, which allow users to create custom shapes and extrude them into 3D space. Once the floor plan is complete, users can begin adding walls by extruding the edges of the floor plan up to create the desired height. Maya also offers a variety of tools for adding doors, windows, and other architectural details to the walls.
Adding wall objects in Maya can be a complex process, but with the right tools and techniques, users can create stunning 3D environments that are both functional and visually appealing. Whether you are a professional 3D artist or a hobbyist looking to explore the world of 3D modeling, learning how to add wall objects in Maya is an essential skill that can open up a world of creative possibilities.
Falling into how it works… Wall Creation
Creating walls is an essential part of any architectural 3D modeling project. In Maya, there are several tools and techniques that can be used to create walls quickly and easily. This section will cover the basics of wall creation in Maya, including using the Polygon Tool, extruding wall shapes, and adjusting wall dimensions.
Using the Polygon Tool
The Polygon Tool is a powerful tool in Maya that can be used to create walls quickly and easily. To use the Polygon Tool, simply select it from the Maya toolbar and then click and drag to create a polygon. Once the polygon is created, it can be adjusted using the Scale and Move tools to adjust its size and position.
Extruding Wall Shapes
Extruding wall shapes is another great technique for creating walls in Maya. To extrude a wall shape, simply select the shape you want to extrude and then use the Extrude tool to pull it out and create a wall. This technique is particularly useful for creating walls with complex shapes or for creating walls that need to be adjusted later.
Adjusting Wall Dimensions
Once a wall has been created, it can be adjusted using the Scale and Move tools. To adjust the dimensions of a wall, simply select it and then use the Scale tool to adjust its size. The Move tool can be used to adjust the position of the wall.
In conclusion, creating walls in Maya is a straightforward process that can be accomplished using a variety of tools and techniques. By using the Polygon Tool, extruding wall shapes, and adjusting wall dimensions, users can quickly and easily create walls that are perfect for any architectural 3D modeling project.
Adding Details to Walls
When creating a 3D model in Maya, adding details to walls is an important step to make the model look more realistic. In this section, we will discuss how to add details to walls using various techniques.
Inserting Edge Loops
One way to add details to walls is by inserting edge loops. Edge loops are lines of edges that run around a model and can be used to create different shapes and forms. By inserting edge loops, you can create additional geometry on the wall surface, which can be used to add details such as molding, baseboards, or other decorative elements.
To insert edge loops, select the wall object and go to Edit Mesh > Insert Edge Loop Tool. This will bring up the Insert Edge Loop Tool options. You can adjust the number of edge loops and their position on the wall surface using the options in the tool. Once you have set the options, click on the wall surface where you want to insert the edge loop.
Creating Wall Openings
Another way to add details to walls is by creating wall openings. Wall openings can be used to create doors, windows, or other openings in the wall surface. To create a wall opening, select the wall object and go to Edit Mesh > Split Polygon Tool. This will bring up the Split Polygon Tool options. You can adjust the position of the split line and the number of splits using the options in the tool. Once you have set the options, click on the wall surface where you want to create the opening.
Adding Surface Textures
Adding surface textures is another way to add details to walls. Surface textures can be used to create different patterns and designs on the wall surface. To add surface textures, select the wall object and go to Window > Rendering Editors > Hypershade. This will bring up the Hypershade window. From here, you can create and edit materials that you can then apply to the different parts of your model. You can also adjust the surface texture settings to create different effects such as bump mapping or displacement mapping.
In conclusion, adding details to walls is an important step in creating a realistic 3D model in Maya. By using techniques such as inserting edge loops, creating wall openings, and adding surface textures, you can create a more detailed and visually appealing model.
Advanced Wall Features
Customizing Wall Components
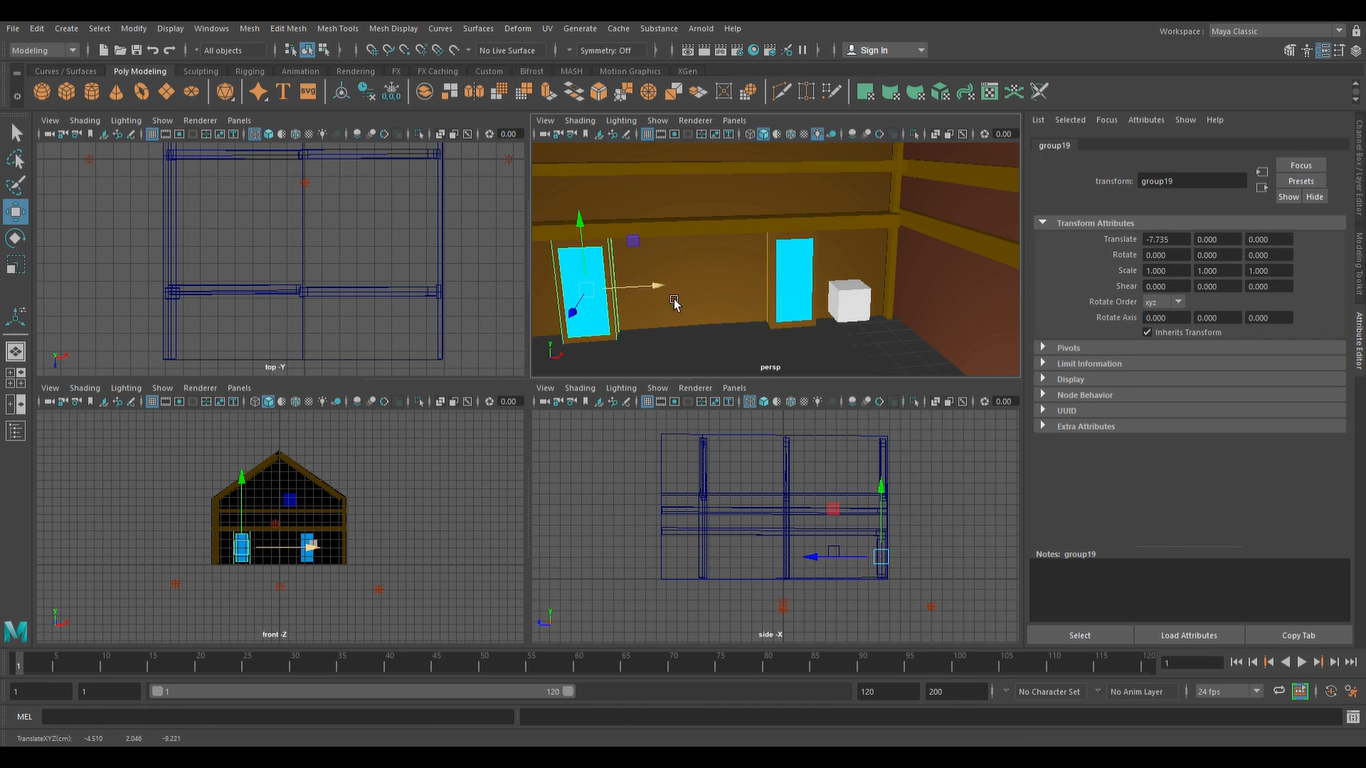
In Maya 3D, users can customize their wall components to create unique and personalized walls. This feature allows users to create walls that are not only visually appealing but also functional. To customize wall components, users can use the “Modify Wall” tool, which is located in the “Wall” section of the “Create” menu.
The “Modify Wall” tool allows users to adjust the height, width, and thickness of their walls. Users can also add or remove wall segments, adjust the angle of the wall, and adjust the spacing between wall segments. Additionally, users can add custom textures to their wall components to create unique and personalized walls.
Utilizing Boolean Operations
Another advanced feature of wall objects in Maya 3D is the ability to utilize Boolean operations. Boolean operations allow users to combine or subtract objects to create complex shapes and structures. In the context of wall objects, Boolean operations can be used to create windows, doors, and other openings in walls.
To utilize Boolean operations in Maya 3D, users can use the “Boolean” tool, which is located in the “Mesh” section of the “Create” menu. This tool allows users to combine or subtract objects by selecting two or more objects and applying a Boolean operation.
Overall, these advanced wall features in Maya 3D allow users to create unique and personalized walls that are not only visually appealing but also functional. By customizing wall components and utilizing Boolean operations, users can create walls that meet their specific needs and requirements.
Lighting and Rendering
Maya is a powerful 3D modeling software that allows users to create stunning 3D scenes and objects. However, to truly bring your models to life, you need to apply lighting effects and render the scene. This section will cover the basics of lighting and rendering in Maya.
Applying Lighting Effects
Lighting is one of the most important aspects of 3D modeling. It can make or break a scene, and it’s important to get it right. Maya offers a wide variety of lighting options, including directional and spotlights. These lights can be adjusted to create different effects and moods.
To add lighting to your scene, simply select the light you want to use and place it in the scene. You can then adjust the light’s properties to create the desired effect. Maya also offers tools for creating more complex lighting setups, such as three-point lighting.
Rendering the Scene
Once you have applied lighting to your scene, it’s time to render it out. Rendering is the process of creating a final image or animation from your 3D scene. Maya offers several rendering options, including the Maya hardware renderer and the Arnold renderer.
To render your scene, simply select the render settings you want to use and start the render. Maya will then render out your scene and create a final image or animation. It’s important to note that rendering can be a time-consuming process, especially for complex scenes.
In conclusion, lighting and rendering are essential aspects of 3D modeling in Maya. By applying the right lighting effects and rendering your scene, you can create stunning 3D models that truly come to life.
Finalizing the Project
Cleaning Up the Scene
Once the wall objects have been added to the scene, it is important to clean up any unnecessary elements. This will help to reduce the file size and make it easier to work with the scene in the future.
One way to clean up the scene is by deleting any unused materials, textures or lights. This can be done by selecting the unwanted element and pressing the delete key or by using the outliner to find and delete the element.
Another way to clean up the scene is by merging any overlapping vertices, edges or faces. This can be done by selecting the overlapping elements and using the merge vertices tool. It is important to make sure that the merge threshold is set to a suitable value to avoid merging elements that should not be merged.
If you are into more projects such as Maya 3D that we made for the blog, then I suggest you check out our main blog categories and some extra stories on our blog.
Check out Maya today and special thanks to AngeloJacksonED for supplying the video.