Table of Contents
Video Tutorial
Upgrading Wall Doors on Maya 2019: Tutorial and Demonstration
Maya 2019 is a powerful 3D modeling software, widely used in the entertainment industry for creating high-quality animations, visual effects, and video games. One of the most important aspects of creating a realistic 3D environment is the ability to create and upgrade wall doors. Upgrading wall doors in Maya 2019 requires a solid understanding of the software’s features and tools. In this article, we will provide a step-by-step tutorial on how to upgrade wall doors in Maya 2019.
The article will begin with an overview of Maya 2019 door upgrading, followed by a section on getting started with Maya 2019. Next, we will dive into modeling the new door, texturing and materials, rigging and animation, lighting and rendering, and finalizing the upgrade. We will also provide a section on troubleshooting common issues and best practices and tips to help you create a seamless workflow.
Whether you are an experienced 3D artist or a beginner, this article will provide you with the knowledge and skills you need to upgrade wall doors in Maya 2019. With our step-by-step tutorial and expert tips, you will be able to create stunning 3D environments that are both realistic and visually appealing.
Key Takeaways
- Upgrading wall doors in Maya 2019 requires a solid understanding of the software’s features and tools.
- A step-by-step tutorial on upgrading wall doors in Maya 2019 includes modeling, texturing, rigging, animation, lighting, and rendering.
- Troubleshooting common issues and following best practices and tips can help create a seamless workflow.
Overview of Maya 2019 Door Upgrading
Maya 2019 is a powerful 3D modeling software that allows users to create stunning animations and graphics. One of the key features of Maya 2019 is its ability to upgrade wall doors to make them look more realistic. This section will provide an overview of the benefits of upgrading wall doors and the prerequisites and materials needed to do so.
Benefits of Upgrading Wall Doors
Upgrading wall doors in Maya 2019 can provide several benefits. First, it can make your animations and graphics look more realistic. This is because the upgraded doors will have more detail and texture, which can make them appear more like real-world objects. Second, upgrading wall doors can save time. By using Maya 2019’s advanced features, users can quickly and easily upgrade wall doors without having to spend hours manually creating each detail. Finally, upgrading wall doors can help users stand out. By creating more realistic and detailed animations and graphics, users can set themselves apart from the competition and create more engaging content.
Prerequisites and Materials Needed
To upgrade wall doors in Maya 2019, users will need a few prerequisites and materials. First, they will need to have a basic understanding of Maya 2019. This includes knowledge of its user interface, tools, and features. Second, users will need to have access to Maya 2019. This can be done by purchasing a license or downloading a free trial from Autodesk’s website. Finally, users will need to have the necessary materials to upgrade wall doors. This includes textures, images, and other assets that can be used to create more detailed and realistic doors.
In conclusion, upgrading wall doors in Maya 2019 can provide several benefits, including more realistic animations and graphics, time savings, and the ability to stand out. To do so, users will need to have a basic understanding of Maya 2019, access to the software, and the necessary materials to upgrade wall doors.
Getting Started with Maya 2019
Maya 2019 is a powerful 3D modeling software that can be used to create a wide range of objects, including doors and door components. In this section, we will introduce the basics of using Maya 2019 to create and upgrade wall doors.
Navigating the Interface
When you first open Maya 2019, you will be presented with a complex interface that may seem overwhelming at first. However, with a little practice, you will quickly become familiar with the various menus, panels, and tools that make up the interface.
One of the most important panels in Maya 2019 is the viewport, which displays your 3D models. You can use the viewport to manipulate your models, zoom in and out, and change the camera angle.
Another important panel is the Attribute Editor, which displays the properties of your selected object. You can use the Attribute Editor to adjust the size, position, and other properties of your models.
Understanding the Basics of Door Components
Before you start creating a door in Maya 2019, it is important to understand the basic components of a door. A typical door consists of a frame, a panel, hinges, and a handle.
In Maya 2019, you can create each of these components separately and then combine them to form a complete door. For example, you can create a rectangular frame using the Create Polygon Tool, and then extrude it to create depth. You can then create a panel using the same tool, and attach it to the frame using the Bridge Tool.
Once you have created the frame and panel, you can add hinges and a handle using the Insert Edge Loop Tool and the Extrude Tool. With a little practice, you can create a realistic-looking door that can be used in a variety of 3D modeling projects.
Modeling the New Door
Setting Up the Scene
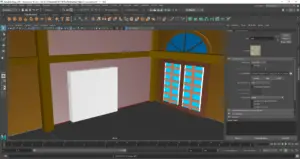
Before modeling the new door, it is important to properly set up the scene in Maya 2019. This includes creating a new project and setting the project directory, as well as importing any necessary reference images or blueprints. It is also important to ensure that the scene is properly scaled and that the units are set to match the real-world scale of the door.
Creating the Door Geometry
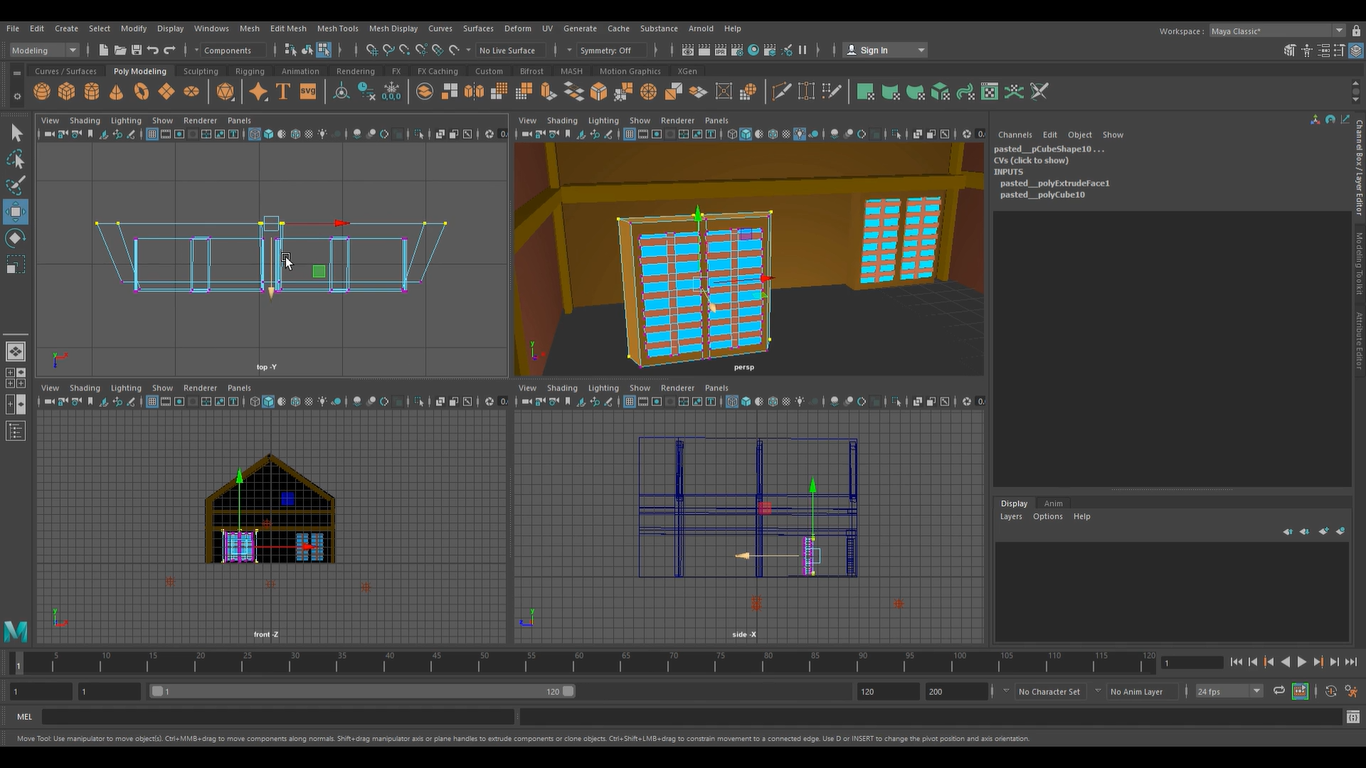
To create the door geometry, the first step is to create a new polygon object in Maya. This can be done by going to the Create menu and selecting Polygon Primitives, and then choosing the appropriate shape for the door. In this case, a rectangular shape is appropriate for the door.
Once the polygon object has been created, the next step is to use Maya’s modeling tools to shape the object into the desired form. This can include using the Extrude tool to create depth, the Bevel tool to add rounded edges, and the Split Polygon tool to add additional geometry where needed.
It is also important to pay attention to the details of the door, such as any handles, hinges, or other hardware. These can be created using Maya’s modeling tools or by importing pre-made models from external sources.
Overall, modeling a new door in Maya 2019 requires a combination of technical skill and attention to detail. By properly setting up the scene and using Maya’s powerful modeling tools, it is possible to create a realistic and detailed door that is suitable for use in a wide range of projects.
Texturing and Materials
Applying Textures
In the Upgrading the Wall Doors on Maya 2019 tutorial and demonstration, Andrew and Angelo demonstrate how to add textures to the door model to make it look more realistic. They begin by opening the Hypershade window and creating a new material. They then apply a texture to the material by selecting the file node and loading an image file. They adjust the texture’s placement and scaling by using the UV Editor. Finally, they assign the material to the door model.
Adjusting Material Properties
In addition to applying textures, Andrew and Angelo also adjust the material properties to further enhance the door’s appearance. They adjust the color, specular, and roughness properties to create a more realistic metal material. They also add a bump map to create the appearance of small imperfections on the surface of the door. Finally, they adjust the lighting in the scene to better highlight the door’s material properties.
Overall, the Upgrading the Wall Doors on Maya 2019 tutorial and demonstration provides a comprehensive guide to adding textures and adjusting material properties in Maya. By following the steps outlined in the tutorial, users can create more realistic and visually appealing 3D models.
Rigging and Animation
Setting Up Door Rigging
Rigging is an essential part of the animation process in Maya 2019. It involves setting up a skeleton structure for the object to be animated. In the case of upgrading wall doors, the rigging process is necessary to create a realistic opening and closing animation.
To set up the door rigging, the first step is to create joints. In Maya 2019, the joint tool can be found under the Skeleton menu. The joints should be placed in a way that mimics the movement of the door. The number of joints required will depend on the complexity of the door movement. Once the joints are in place, they can be connected using the parent-child relationship to create a hierarchical structure.
The next step is to create the control objects for the rig. These objects will be used to manipulate the joints and, in turn, the door. The control objects can be created using the curve tool in Maya 2019. These curves can be customized to suit the animator’s needs. Once the control objects are created, they can be linked to the joints using the “parent constraint” tool.
Animating the Door Opening
With the rigging in place, the next step is to animate the door opening. This involves manipulating the control objects created in the previous step. The animator can use keyframes to set the position of the control objects at different points in time. Maya 2019 provides a variety of animation tools to make this process easier.
One of the most useful tools for animating the door opening is the graph editor. The graph editor allows the animator to view and edit the animation curves for the control objects. This makes it easier to create smooth and realistic animations.
Another useful tool for animating the door opening is the time editor. The time editor allows the animator to manipulate the timing of the animation. This can be useful for creating dramatic or comedic effects.
In conclusion, rigging and animation are essential parts of the process of upgrading wall doors in Maya 2019. With the right tools and techniques, animators can create realistic and engaging door opening animations.
Lighting and Rendering
Upgrading the Wall Doors in Maya 2019 involves configuring scene lighting and rendering the final scene.
Configuring Scene Lighting
To create a realistic and visually appealing scene, proper lighting is essential. In Maya 2019, users can add different types of lights to the scene, such as directional and spotlights. Once the lights are added, the lighting parameters can be adjusted to achieve the desired effect. Users can also add light effects such as shadows and reflections to enhance the scene.
Maya 2019 also offers a variety of lighting presets that can be used to quickly set up the scene lighting. Users can choose from different presets such as daylight, sunset, and night-time lighting. These presets can be further customized to achieve the desired effect.
Rendering the Final Scene
Once the scene lighting is configured, the next step is to render the final scene. Maya 2019 offers a powerful rendering engine that allows users to create high-quality images and animations.
Users can choose from different rendering options such as Arnold, Maya Software, and Mental Ray. Each rendering option has its own strengths and weaknesses, and users can choose the one that best suits their needs.
To render the final scene, users need to set the rendering parameters such as image size, image quality, and file format. Maya 2019 also offers batch rendering, which allows users to render multiple frames at once.
In conclusion, configuring scene lighting and rendering the final scene are crucial steps in creating a visually appealing and realistic scene in Maya 2019. With the right tools and techniques, users can create stunning images and animations that meet their needs and exceed their expectations.
Finalizing the Upgrade
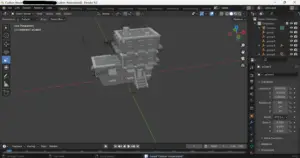
Reviewing the Upgraded Door
After upgrading the wall doors in Maya 2019, it is important to review the changes made to ensure that they meet the desired specifications. This can be done by comparing the new and old versions of the door to identify any differences and make necessary adjustments.
One way to do this is by using the “Viewport 2.0” display mode in Maya 2019, which provides a more realistic representation of the final output. The upgraded door can be viewed from different angles and in different lighting conditions to ensure that it looks as intended.
Exporting and Integrating with the Environment
Once the upgraded door has been reviewed and approved, it can be exported in a suitable format for integration with the environment. Maya 2019 provides various export options such as FBX, OBJ, and Alembic.
Before exporting, it is important to ensure that the door is properly positioned and aligned with the rest of the environment. This can be done by using the “Snap to Grid” feature in Maya 2019, which helps to align objects with the grid for a more precise placement.
After exporting, the upgraded door can be integrated into the environment using a suitable software such as Unity or Unreal Engine. This involves importing the exported file and positioning it in the desired location within the environment.
Overall, upgrading the wall doors in Maya 2019 involves making necessary changes to improve their appearance and functionality. By reviewing the upgraded door and exporting it in a suitable format for integration with the environment, users can achieve a more realistic and visually appealing output.
Troubleshooting Common Issues
When upgrading the wall doors on Maya 2019, there are some common issues that might arise. Here are some troubleshooting steps to help address these issues:
1. Resetting Tools and Manipulators
If the tools or manipulators are not working properly, resetting them can be a helpful solution. To reset tools individually, click the options box associated with that tool, click Edit, then Reset Settings. For the manipulators (move, scale, rotate) on the left side of the Maya workspace, double click the tool icon to open the Tool Settings Window. Click Reset Tool at the top of the Settings window.
2. Checking for Compatibility Issues
Before upgrading, it is important to check for compatibility issues with the new version of Maya. Certain plugins or scripts may not work with the upgraded version, causing errors or crashes. It is recommended to check with the plugin or script developer for any updates or compatibility information before upgrading.
3. Updating Graphics Drivers
Outdated graphics drivers can cause issues with Maya, including crashes or display problems. It is recommended to check for updates to graphics drivers and install them if available. This can often resolve issues with display or performance.
4. Clearing Cache and Preferences
If Maya is running slow or experiencing issues, clearing the cache and preferences can help. This can be done by deleting the contents of the Maya preferences folder or using the “Reset to Default” option in the Preferences window. However, be aware that this will reset all preferences and customizations, so it is recommended to back up any important settings before doing so.
By following these troubleshooting steps, common issues when upgrading the wall doors on Maya 2019 can be resolved quickly and efficiently.
Best Practices and Tips
When upgrading the wall doors on Maya 2019, it is important to follow some best practices and tips to ensure a smooth and efficient process. Here are some key recommendations:
1. Plan Ahead
Before starting the upgrade process, it is important to have a clear plan in place. This includes identifying the specific doors that need to be upgraded, determining the required resources, and establishing a timeline for completion. By planning ahead, you can minimize the risk of errors and ensure that the upgrade is completed on time and within budget.
2. Use Templates
Using templates can save a lot of time and effort when upgrading wall doors in Maya 2019. Templates provide a pre-built structure that can be customized to meet your specific needs. This can include things like pre-defined materials, textures, and lighting settings. By using templates, you can ensure consistency across all of your upgraded doors and reduce the risk of errors.
3. Test and Iterate
It is important to test your upgraded doors thoroughly before finalizing the upgrade. This can include things like checking for errors, testing the functionality of the doors, and ensuring that they meet the required specifications. If any issues are identified, it is important to iterate on the design until the issues are resolved.
4. Document the Process
Finally, it is important to document the entire upgrade process. This includes documenting the steps taken, the resources used, and any issues that were encountered. By documenting the process, you can ensure that the upgrade can be replicated in the future if needed, and that any issues can be easily identified and resolved.
If you are into more projects such as Maya 3D that we made for the blog, then I suggest you check out our main blog categories and some extra stories on our blog.
Check out Maya today and special thanks to AngeloJacksonED for supplying the video.